
Best Bunker Layout in Bunker vs Verity
A practical Bunker vs Verity bunker layout you can rebuild: one controlled entrance, overlapping turret arcs on the approach and a fallback line behind the first wall — plus how the four documented builds differ, so you can pick the one that fits your team.
Every Bunker vs Verity layout guide starts from the same honest conditional: the best design depends on your player count, your resources and how long you expect waves to run. But the guides converge on one core that every effective base shares — a protected entrance, clear firing lanes, a safe interior movement route, and a fallback position for repairs. Build that core first, then bend it toward one of four named layouts as your run develops. Here is the core arrangement, where each layout wins and loses, and the turret placements that make them hold.
A layout you can rebuild: the entrance-focused compact core
This is the Compact Solo pattern — the cheapest documented build to get standing, and the foundation the other layouts grow from:
- Choose the spot before placing anything. You want clear sightlines from your defenses to the entrance, plus room for repairs, movement and later expansion. Avoid tight spaces that block firing paths and ground that lets Verities circle behind your firing arc.
- Place main walls and the entrance first. Keep the interior compact so it can be reinforced cheaply, and skip decorative building — every exposed section is a potential breach point.
- Cover the approach lane. Defenses must watch the path leading to the entrance, not sit in isolated corners.
- Cross two turret arcs at the entrance. Two turrets whose fields of fire overlap at the entrance outperform two turrets watching separate, secondary lanes. If two turrets watch the same lane while another approach sits untouched, redistribute instead of stacking.
- Leave a fallback behind the first layer. A secondary position inside the walls saves late-wave runs. Expand only once the current line is fully functional.
- Hold a coin reserve. Keep enough after your first builds for at least one emergency repair.
Two checks tell you the layout is working. Before each wave, do the guides' 30-second inspection: firing angles clear of walls, props and teammates, movement paths open, no missing wall sections — a blocked turret contributes zero damage regardless of its tier. During a wave, use the coverage check from the glass-bunker guide: if your turrets can see and fire at enemies along the entire approach instead of only at the entrance, your layout is doing its job.
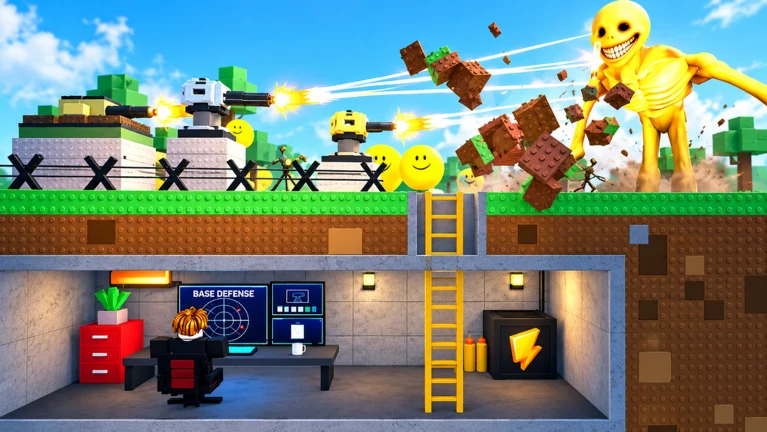
This page is about geometry and coverage rather than placement controls — the how to build a bunker walkthrough covers the building basics step by step.
How the four documented layouts differ
| Build | Best for | Layout core | Main weakness |
|---|---|---|---|
| Compact Solo Bunker | Solo players, early survival | Small central room, one controlled entrance, short wall lines | Blocked firing angles are very costly in tight space |
| Cooperative Crossfire | 2+ players | Central area with two overlapping firing lanes | Crowded interior limits movement |
| Long-Wave Reinforced | Extended, late waves | Primary defense line, protected interior route, fallback position | Expensive, slow to finish, vulnerable mid-build |
| Hidden-Defense | Protecting turrets | Defenses behind strong wall sections, arcs kept open toward the approach | Over-cover creates blind spots |
The same guides rate the builds like this:
| Build | Entrance control | Repair access | Cost efficiency | Late-wave scaling |
|---|---|---|---|---|
| Compact Solo | ★★★★★ | ★★★☆☆ | ★★★★★ | ★★☆☆☆ |
| Crossfire Co-op | ★★★★☆ | ★★★★☆ | ★★★★☆ | ★★★★☆ |
| Reinforced Long-Wave | ★★★★☆ | ★★★★★ | ★★★☆☆ | ★★★★★ |
| Hidden-Defense | ★★★☆☆ | ★★★☆☆ | ★★★☆☆ | ★★★★☆ |
These stars are guide assessments, not measured results — no source has run the layouts against identical waves, so read them as priorities, not proof. One condition does flip the recommendation: under sustained giant-Verity pressure, one guide reports the Long-Wave Reinforced build performing best, because its primary line, protected interior route, fallback position and repair reserve are built for a siege. Its wall rule under that pressure is worth adopting in any layout: upgrade the sections that get attacked most before spending anywhere cosmetic — a single reinforced entrance lane beats five half-upgraded walls.
Glass, reinforced, or both
A glass bunker uses transparent or low-durability wall sections so turrets and players see Verities coming, trading wall strength for information and uninterrupted firing angles:
| Criteria | Glass bunker | Reinforced bunker |
|---|---|---|
| Sightlines | Excellent, full approach visibility | Limited, walls block firing arcs |
| Turret coverage | Overlapping lanes, fewer blind spots | Requires careful placement to avoid gaps |
| Wall durability | Lower, needs active repairs | High, absorbs repeated attacks |
| Coin efficiency | Cheap initial structure | Higher upfront cost |
| Repair demand | Constant during waves | Mostly between waves |
| Best phase | Early to mid waves | Mid to late waves |
| Team fit | Co-op with a dedicated builder | Solo or flexible teams |
Neither philosophy is strictly better, and the guides describe the most reliable recent builds as combining both: a transparent front layer for turret coverage with a reinforced interior fallback line behind it — early-wave visibility and late-wave survivability in one structure. One solo caveat applies: a glass-style front is viable alone in early and mid waves, but a solo player cannot repair and fight at the same time, so build the reinforced fallback earlier than a co-op team would and keep a larger coin reserve for emergency wall repairs.
Turret placements that match the threat
Whatever the shell of the base, match the defense to the threat pattern rather than copying a layout blindly:
| Threat type | Best turret role | Placement | Team action |
|---|---|---|---|
| Rushing Verities | Fast-Attack Early Defense (B-tier) | Near entrance, short lane | Gunner watches the door |
| Durable Verities | Single-Target Damage (A-tier) | Long clear sightline | Focus fire, no chasing |
| Grouped pushes | Crowd-Control Defense (A-tier) | Chokepoints | Scout calls the lane early |
| Mixed late waves | Balanced Core Defense (S-tier) | Main approach coverage | Repair while firing |
The behavior behind those rows: swarm Verities approach in groups spread across lanes, so crowd-control turrets belong near chokepoints; bruiser Verities hammer walls, so high single-target damage belongs on the approach lane; fast movers need early defense with clear sightlines; and breachers concentrate on your weakest wall section, which is what reinforced walls plus a layered fallback are for. If multiple Verities break through at once, the documented answer is a crossfire arrangement — overlapping turret arcs at the entrance, a scout calling the threatened lane early, and a coin reserve so the builder can reinforce the correct section before it fails. Crowd-control defenses at chokepoints buy the time for those repairs even when their raw damage is lower. The per-turret details live in the turret placement guide, and the Verity enemies page profiles each attacker type.
What player count changes — and what it doesn't
Player count decides which layout fits: solo players and early runs get the Compact Solo Bunker, two or more players get Cooperative Crossfire with separate lanes divided among them, and teams holding extended waves get Long-Wave Reinforced. Servers hold up to six players, and co-op teams do best with duties divided rather than everyone building the same walls. What no guide documents is player count changing the build space itself — the documented effect is on layout fit and duty division, not bigger plots.
| Team size | Roles | Duty split |
|---|---|---|
| 2 players | Builder and Defender | One builds and repairs; one holds the strongest firing position |
| 3 players | Builder, Gunner, Scout | Scout calls threats early so the builder reinforces the right section |
| 4+ players | Dedicated defense team | Fixed turret operators, one repair player, one flexible responder, one resource coordinator |
| Any size | Wave coordinator | Confirms repairs, staffing and coin reserve before each wave |
Priorities as waves get harder
| Phase | Wall priority | Turret priority | Coin rule |
|---|---|---|---|
| Early waves | Close exposed entrances before upgrades | One turret on the main approach | Keep a reserve after first builds |
| Middle waves | Upgrade frequently attacked sections | Add coverage only when a lane slips | Save for repairs plus one turret |
| Late waves | Reinforce the weakest sections first | Upgrade effective positions, keep overlap | Enter hard waves with a reserve |
| Between waves | Inspect damage, predict the next breach | Check firing angles and coverage gaps | Split coins between repairs and upgrades |
Before every wave, the documented checklist is: all wall sections closed with no exposed entrances, turret arcs clear of walls and teammates, a coin reserve covering at least one emergency repair, team roles assigned, and a fallback position identified inside the bunker. When choosing what to upgrade, use the failure you actually saw: if enemies broke through walls, reinforce those sections first; if the bunker survived long enough to take damage, turret coverage or placement is the problem — fix blocked firing angles before buying new turrets. The waves guide breaks down what each phase sends at you, and if the reserve keeps running dry, how to get coins covers rebuilding it — active codes are tracked on the Codes page.
What real runs show
Recorded solo runs put faces on these tradeoffs:
- One-direction wall with an entrance turret cluster (one run, reached wave 18). The player read a single approach direction, walled it off, placed two turrets in the middle covering both directions, and lined three shotgun turrets side by side exactly at the entrance, with hidden spike traps and spiked doors in front and an electric floor behind the entrance for breaches, plus a raised tower to shoot from above. At wave 10, enemies also came from the side — "they come from the side too — I did not expect that" — forcing mid-run reinforcement, and explosive Verities smashed wall blocks.
- Perimeter of Verity blocks with front turret mass (one run, reached wave 90+). The base was enclosed with blocks — Verity blocks at 50,000 HP per block by the player's readout — with two doors and turrets stacked at the front and on top. Verities pressed the front that run, so the uncovered back was never tested.
- Underground room with a turret ring (one run, reached wave 26). Weapons were ringed around the structure with spike and TNT traps and electric floors so nothing could approach. Verities dug down into the underground room and attacked from directions other than the front; the player's own conclusion was that the weapons should surround the base because enemies do not come only from the front. Some TNT traps also failed to detonate on certain Verities.
- Roof-mounted turret base (one run). Weapons sat on the roof with openings to fire around the structure and the top closed so enemies could not climb up, while the back was initially left partly open. Enemies eventually attacked from behind, forcing a re-aim of the roof weapons, and a late wave destroyed the bunker door.
Three of these four runs were hit somewhere other than the main front — a side lane, a dig-in, a rear attack. Each is a single session, so none proves where Verities attack in your matches, but together they explain why every documented layout overlaps its arcs, keeps a fallback inside the walls, and treats "they only come from the front" as an assumption to verify, not a plan.
Build the compact core, run it in a real wave, and note where the walls actually take damage. Reinforce that lane first, re-check your firing angles before the next wave, and let the base grow into whichever of the four layouts your team and wave length actually call for.
Related Guides
Turret Placement
Place turrets where they actually defend: cover the main approach, overlap firing arcs, and keep every lane covered.
Building Blocks
See which building blocks are confirmed in real runs, what each does, and how placement limits work.
Defense Strategy
Run the day-to-night defense cycle: overlapping turret coverage, repairs under fire, and coin spending by wave phase.