
Bunker vs Verity Beginner Guide
A first-session route through Bunker vs Verity: dig in, wall the entrance, place your first turret, start the raid, and finish night one with coins to spare.
In Bunker vs Verity, you spend the time between raids fortifying a bunker with blocks and turrets, then hold it against waves of Verities — every enemy defeated pays coins that fund more walls, turrets and upgrades, and your score is how many waves you survive. Your first priority is the same as everyone else's: dig down into the bunker, close the hatch, wall the entrance, and get one turret covering it before you start the first raid.
What you are trying to survive
Bunker vs Verity is a defensive survival game on Roblox by Beyondd Games for up to six players. Verities are the hostile entities that emerge in waves and try to breach your bunker. The official loop reads: fortify your bunker with blocks, place and control turrets, fight off endless waves, earn coins from defeating enemies, upgrade your bunker and defenses, hide underground when things get crazy, and see how many waves you can survive. Difficulty scales with survival time — the longer you last, the harder the Verities become.
Guides describe the rhythm as day and night: a preparation window for building, earning and upgrading, then a night attack. In actual play the raid is player-triggered — footage shows players pressing the Start raid button (key 1) when they are ready — and building is locked while a wave is active. The safe mental model is a preparation window you control, then a raid, then another window. That control matters: don't press Start raid until the entrance is walled and covered.
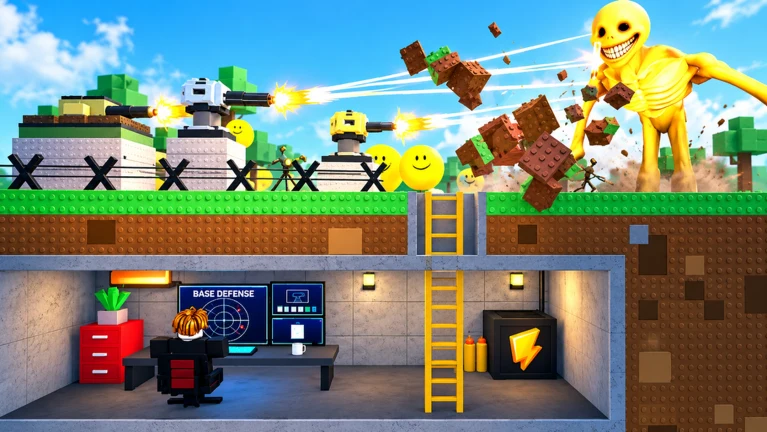
Your first session, step by step
The keys you will actually use, all shown in recorded gameplay: press 2 to dig, P to open the blocks menu, 3 in the build menu to switch to turrets, and 1 to start the raid. You also carry a rifle for shooting Verities directly.
- Pick a defensible spot. Choose a position with clear sightlines for your defenses and enough room to move, repair and expand later. Do not build so tightly that walls, props or teammates block firing paths.
- Dig in and close the hatch. Press 2 to dig down into the bunker, then close the hatch before Verities arrive.
- Wall the entrance first. Main walls and the entrance come before anything else. Some basic low-HP blocks are free, so you can wall up before you have earned anything; keep the interior compact so later reinforcement is cheap, and skip decoration entirely. The game itself prompts you to build a wall when a raid is coming — obey it early, not mid-crisis.
- Place your first turret on the main approach. Open the build menu (3), pick a turret and drag it into place so it covers the approach to the entrance and the most likely attack lane. A first turret can be free; later ones cost coins. Once placed, turrets fire automatically. As one player sums up the shop's basic split: red turrets have simple range and damage, while green turrets have very good range and damage. The turrets guide compares the options in detail.
- Hold back a coin reserve. However small your first balance feels, do not spend all of it before the first night.
- Run a final check. Entrance covered by at least one defense; firing lanes clear of walls and teammates; movement paths clear inside; weakest wall sections reinforced; on a team, roles and lanes assigned.
- Start the raid and defend. Press 1. Stay near the bunker, shoot with your rifle, and let the turret work the approaching groups. If one side starts losing, shift your attention to it instead of abandoning the defense.
That is the whole opening. Success is easy to recognize: finish the first night with repaired walls, at least one intact turret, and coins still in reserve — regardless of how many Verities slipped through. If you want more construction detail, the bunker building guide and the turret placement guide expand on steps 3 and 4.
How the first waves play
Early-wave Verities are low-durability. They mostly test your entrance coverage, and a single well-placed turret handles them — so a clean first wall plus one turret on the main approach is genuinely enough for night one. The waves guide explains how the pressure builds afterward.
During a raid:
- Stay near the bunker. Chasing Verities away from the defensive zone opens an entrance for the rest of the wave.
- Concentrate fire on the most dangerous targets first — usually the durable Verities chewing on walls — and let turrets handle the groups still approaching.
- Prioritize Verities that actually reach the bunker over anything else. The defense strategy guide covers target priorities in depth.
- You cannot build while a wave is active, so all spending and repairs wait for the window between raids.
Between raids, inspect and adjust: check what took damage, find the next likely breach point, verify turret angles and coverage gaps, then split your coins between repairs and the next upgrade.
Coins: what to buy and what to skip
Every Verity defeated pays coins, and coins are the only reason the next wave is survivable: they buy walls, turrets, repairs and upgrades. Four rules keep a first run alive:
- Never spend the full balance before nightfall. A repair fund is worth more than a small early upgrade, because a single breached wall can end a run regardless of how many turrets you own.
- Buy structure first, decoration never. Early coins belong to essential structure and one dependable turret covering the main approach.
- Enter harder waves with coins in hand. Relying on income earned mid-attack is one of the most common causes of late-run collapses.
- Match purchases to the phase using this decision table:
| Phase | Wall priority | Turret priority | Coin rule |
|---|---|---|---|
| Early waves | Close exposed entrances before upgrades | One turret on the main approach | Keep a reserve after first builds |
| Middle waves | Upgrade frequently attacked sections | Add coverage only when a lane slips | Fund a repair, one upgrade and one turret |
| Late waves | Reinforce the weakest sections first | Upgrade effective positions, keep overlap | Enter hard waves with a full reserve |
| Between waves | Inspect damage, find the next breach point | Check angles and coverage gaps | Split coins between repairs and the next upgrade |
The early-wave and between-wave rows are your first session; the rest applies as your run extends. Earning itself has its own tricks — the coins guide covers them.
One honest caveat about prices: recorded sessions show different costs (one video's first turret is free, its next purchase costs 800), and game updates change the shop, so this guide quotes no current prices. The in-game build menu is the source of truth for what anything costs today, and the Updates page tracks recent changes.
Five beginner mistakes that end runs
Each of these is documented with its mechanism, not guessed:
- Spending the entire balance before the first night. The one breached wall that a repair fund would have saved ends the run.
- Building too tightly. A turret whose firing path is blocked by your own walls, props or teammates contributes zero damage regardless of its tier.
- Spreading defenses across several weak positions. Until you know which lane actually needs protection, spread-out defenses lose to one reinforced chokepoint.
- Buying more turrets while existing ones are blocked or badly placed. Fix placement and firing arcs before adding coverage.
- Chasing Verities away from the bunker. Leaving the defensive zone creates openings the rest of the wave exploits.
One guide's failure summary is blunt: most runs end from overspending before nightfall, blocked turret firing angles, or abandoned defense positions. The countermeasures are the same three habits — keep a repair reserve, inspect firing lanes between waves, and stay near the bunker during attacks.
After night one
If you pass the success test — walls repaired, a turret intact, coins in reserve — you have the loop down. Spend the next window the same way: repairs first, then the next improvement the table above points to, usually a second coverage lane or a first upgrade. From there, best upgrades first ranks what to buy as coins accumulate, and how to survive more waves extends the run past the opening. Before your next session, it's also worth checking the Codes page in case a starter code is active.
Related Guides
How Waves Work
Understand the endless wave cycle: day prep, numbered night attacks, the repair window, and how survival is counted.
How to Build a Bunker
Dig in, open the block menu, and wall off a working first bunker before the first Verity wave arrives.
How to Get Coins
The verified kill-and-earn loop: how defeating Verities during raid waves credits coins and which extras add more.
Survive More Waves
Fix the habits that end deep runs: one-entrance builds, coin discipline, between-wave inspections, and targeted upgrades.