
Bunker vs Verity Turrets Guide
Every turret confirmed in Bunker vs Verity so far — shotgun, gatling, Halo and red/green variants — with documented behavior and how to pick the right one.
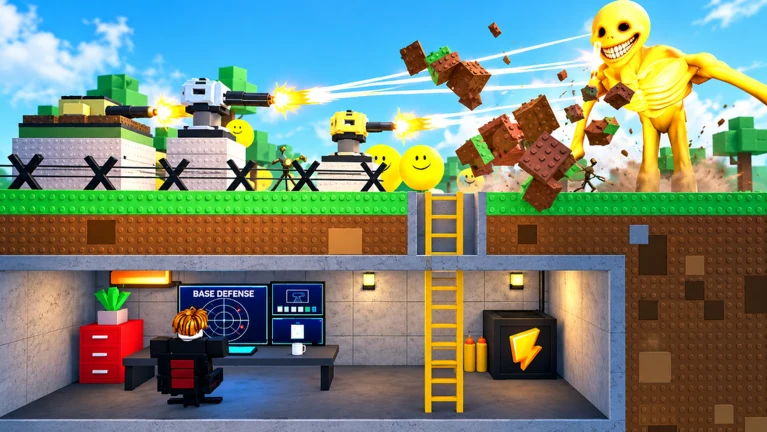
Turrets are the main firepower of a defended bunker in Bunker vs Verity: you buy them with coins, place them on the lanes the Verities use to reach you, and they open fire on their own. The game's official description lists "place and CONTROL powerful turrets" as a core system, and every recorded run shows the placeable half working exactly that way — a turret goes down on a lane and fights for you by itself.
Quick answer: three turrets are confirmed by name in current gameplay footage — the shotgun turret, the gatling turret and the Halo turret — plus a red and green turret variant seen side by side in a raid. If you came looking for all turrets in the game, this verified list is what's documented so far; no source has captured the complete shop inventory yet. Everything below sticks to what each turret demonstrably did, so you can recognize them in your own shop and match them to the right job.
What a turret does for your defense
Turrets are your base's primary damage dealers, not decoration. They provide automated damage on the approach lanes Verities travel, while your walls block and absorb the hits — and among recorded players, one rule repeats: placement matters more than quantity. A turret you never have to touch is the point; one creator sums it up simply: "a turret is a weapon to shoot for you."
The verified turret list
| Turret | What's verified | Best known use |
|---|---|---|
| Shotgun turret | Bought for 800 coins in two separate recorded runs; its shop entry displays an HP value | Holding a chokepoint at close range |
| Gatling turret | A distinct shop option, deliberately chosen over the shotgun and placed in multiples | Covering several approach lanes at once |
| Halo turret | A late-game purchase; the buyer's on-screen readout showed it giving 1,600 HP | Anchoring a deep-wave turret array |
| Red / green turret variants | Seen working side by side during a raid; green showed clearly better range and damage | Choosing green when both are on offer |
Each confirmed turret in detail
Shotgun turret — the close-range specialist
Two independent recordings name this turret. In the first, the creator picks "the shotgun turret" from the shop and pays 800 coins for it. The second recording's shop screen shows a second turret priced at 650 alongside the shotgun at 800, with HP values displayed on the entries — though the video never gives us the actual numbers. Its documented behavior is blunt: shotguns are good at close range and not really accurate at distance. One run's shotgun was still holding the mid position at wave 6, and the same creator later pulled turrets off a quiet side and redeployed three shotgun turrets shoulder to shoulder right at the base entrance — a shotgun wall across the chokepoint.
Use it where Verities arrive, not where they're far away. Entrance and door duty is this turret's proven role.
Gatling turret — coverage in numbers
The Hungarian recording names it as a deliberate alternative: "not the shotgun — a gatling." The creator places several gatlings across the front, side and center of the base, swapping out blocks to make room for each one, and earlier in the same run his turret placements deliberately covered both attack directions. No special stats were narrated for it — its documented strength is exactly what you see: automatic fire, deployed in multiples so several lanes are covered at once.
Use gatlings as your lane-coverage workhorse, and expect to sacrifice a few blocks for the space.
Halo turret — the late-game anchor
The Halo turret shows up late in a very wealthy run: after spending tens of millions of coins filling his roof with turrets, the creator announces "I have the Halo turret. This is going to give me 1,600 HP," and slots it into the roof array expecting it to carry him toward wave 100 — a run that went on to reach the wave-90s. Note the certainty here: the 1,600 HP is one creator's on-screen observation during play, not a verified stat table, and its attack behavior never got its own narration. What's documented is durability and its place as a high-end, deep-wave purchase.
Red and green turret variants
A raid tutorial shows two color classes operating side by side: the red turrets have "really simple range" and modest damage, while "the green turrets actually have very good turret range and damage." The color labels come from the player's spoken description rather than confirmed on-screen UI names — but the practical takeaway holds either way: when you're choosing between a red and a green turret, the green one is showing better range and damage.
Rules every turret follows
- They fire automatically. Once placed, the raid tutorial's turrets worked through the whole raid with no further input.
- They can be destroyed. Verities dismantled a turret that had been holding one base's line, and a wave-10 boss wiped out most of another player's turret collection, leaving just three. Budget for replacements after boss waves.
- Placement slots are limited. One creator's inventory topped out at three turrets he could no longer place, and another had to remove turrets before he could add any more. A "+10 Turret Slots" game pass for R$129 on the game's platform listing confirms the cap is real — and monetized.
- They can be picked up and moved. One creator stripped a turret from a quiet side and redeployed three shotgun turrets side by side at the entrance. If a lane stops being threatened, move the turret instead of buying another.
Choosing the right turret for the job
- Match the turret to the lane. Shotgun turrets for the close chokepoint where Verities break through, gatlings for broad multi-lane coverage, the Halo turret once deep waves are the plan.
- Coverage beats count. Overlapping fields of fire on the lane Verities actually use stop breaches far better than scattered placements — spread-out defenses are weaker than one reinforced chokepoint. Before buying another turret, check every existing one has a clear shot at the lane the threat uses.
- Scale with the waves. One well-placed turret handles early waves, so don't scatter cheap turrets before you know which lane needs protecting. As waves grow heavier, grouped pushes call for overlapping fire at chokepoints, while a single durable Verity calls for focused damage on its approach.
- Spend with your slot cap in mind. Slots are scarce, so decide where each turret goes before you buy — you may not be able to place everything you purchase.
Once you've picked your turret, the turret placement walkthrough covers where to put it, and the broader defense strategy shows how turrets fit into the rest of your layout.
Where turrets come from
What the footage shows about availability, briefly — this page documents the turrets themselves, not a step-by-step acquisition guide:
- The shop is the main observed route, buying with coins earned from defeating Verities — the coins guide covers the earning side, and it's worth checking current codes for a boost before you grind.
- Observed prices vary by session: one run gave the first turret free with the next at 650, the raid tutorial bought one for around 300, and the shotgun cost 800 in two recordings. Treat these as single-session observations, not a guaranteed price list — updates change shops.
- Digging can yield a turret — one creator discovered mid-dig that digging could get him turrets.
- One shop entry required materials, not just coins, to buy the turret it listed.
- Robux purchases exist: a creator placed a Robux-bought turret and called it overpowered, and the +10 Turret Slots pass is also sold for Robux.
What isn't documented yet
No source gives damage, range or fire-rate numbers for any turret — the only HP figure on record is the Halo turret's stated 1,600. The base slot count, the full roster beyond the three named turrets and their color variants, turret upgrade paths, and any manual-control mechanic behind the official "CONTROL" wording are likewise undocumented; every turret seen so far fired on its own. Until proper stat documentation exists, judge turrets by the documented roles above rather than precise-looking numbers.
Bottom line: buy the shotgun turret for your door, gatling turrets for your lanes, and save for the Halo turret when deep waves are the plan — then place them so their fire overlaps on the lanes Verities actually use, and keep more waves within reach.
Related Guides
Turret Placement
Place turrets where they actually defend: cover the main approach, overlap firing arcs, and keep every lane covered.
How to Unlock Weapons
Earn coins from waves and bosses, then buy shop guns like the carbine and SMG; gamepass listings explained.
Defense Strategy
Run the day-to-night defense cycle: overlapping turret coverage, repairs under fire, and coin spending by wave phase.