
Best Upgrades First in Bunker vs Verity: A Conditional Buying Order
Close entrances with walls, place one turret on the main approach, and hold a repair reserve: the supported first-purchase order for Bunker vs Verity, and how wave phase and the Verity mix change it.
There is no single upgrade in Bunker vs Verity that is "best" in every run. Coins are scarce, and the purchase that saves an early run is wasted in a late one. What the available guides and gameplay footage consistently support is a conditional first-purchase order: close your exposed entrances with walls, buy exactly one turret that covers the main approach, and hold a repair reserve. After those three, stop following a fixed list — buy whichever wall section or turret is directly limiting your survival, and let the wave phase and the Verity mix decide the rest.
This page compares the options that are genuinely on the table at the same progression point and gives the reasons behind the order, so you can commit scarce coins deliberately instead of evenly.
Which upgrades can be compared
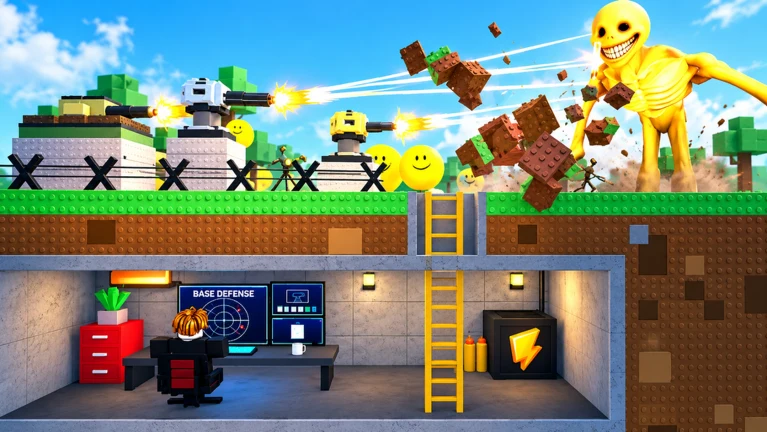
The game's own listing frames the categories you weigh in one build window: fortifying the bunker with blocks, placing and controlling turrets, earning coins from defeated enemies, and a general upgrade path for the bunker and defenses. At any single moment those reduce to three comparable buckets — structural work (blocks and walls), defensive purchases (turrets), and the bunker upgrade and defense upgrade paths — plus a fourth option that is easy to forget: not spending at all, and keeping coins for repairs.
Gameplay shows how real the side-by-side choice is. The blocks menu (press P) lists a free block next to blocks with 20 and 50 HP, free traps share the same window, turrets are priced at 650 and 800 coins, and a bunker upgrade to 3000 HP is visible on the same screen. In one recorded run, the player weighed all of it at once: they bought the 800-coin shotgun turret for the middle of the base, built with the free block and spike traps, and skipped the 3000 HP bunker upgrade for the plain reason that the coins were not there yet. That is the genuine first decision — blocks vs turrets vs traps vs holding coins.
What each supported choice improves
Walls and entrances absorb the attacks. Closing exposed entrances comes before any secondary rooms, and upgrading walls that take repeated hits is usually more efficient than adding redundant firepower. The flip side matters just as much: reinforced walls on a lane nothing attacks are wasted coins.
Turrets add damage, but the roles differ:
| Defense role | Strength | Best use |
|---|---|---|
| Balanced core defense (S tier) | Reliable damage, good range, strong value | Primary entrance position for the whole run |
| Single-target damage (A tier) | Kills durable threats fast | Later waves with one dangerous Verity |
| Crowd control (A tier) | Manages groups, buys repair time | Waves hitting multiple lanes at once |
| Fast-attack early defense (B tier) | Cheap, quick response | Opening phase before income grows |
| Narrow-specialty (C tier) | Situational placement value | Secondary lanes and specific layouts |
The tier letters come from community tier lists, not official stat screens, so read them as a relative ordering of roles rather than exact numbers. The practical core of the ranking holds across those lists: build one balanced core defense before any situational option, because narrow-specialty defenses drop sharply in value when the wave pattern changes. Placement then decides whether any of it works — defenses must cover the approach lane rather than sit in isolated corners, and overlapping coverage on one lane beats one turret each on several lanes.
Your build front decides what repairs demand. Two structural philosophies sit behind the wall work:
| Criteria | Glass bunker | Reinforced bunker |
|---|---|---|
| Sightlines | Excellent, full approach visibility | Limited, walls block firing arcs |
| Turret coverage | Overlapping lanes, fewer blind spots | Needs careful placement to avoid gaps |
| Wall durability | Lower, needs active repairs | High, absorbs repeated attacks |
| Coin efficiency | Cheap initial structure | Higher upfront cost |
| Repair demand | Constant during waves | Mostly between waves |
| Best phase | Early to mid waves | Mid to late waves |
| Team fit | Co-op with a dedicated builder | Solo or flexible teams |
Neither option is strictly better — the right choice depends on team size, wave length, and how much time you can spend on repairs.
The reserve is insurance no upgrade provides. A single breached wall can end a run that a small repair fund would have saved, which is why a reserve for emergency repairs is usually worth more than one extra early upgrade.
The first upgrade decision, and the reasons behind it
- Close exposed entrances with walls. Every opening you leave unsealed is a lane the Verities will use. Walls and the entrance come first (how to build a bunker covers the construction itself); expand into secondary rooms only when the current line is fully functional, and keep a fallback position behind the first layer for late waves.
- Buy exactly one turret that covers the main approach. Position it where its fire reaches the approach to your entrance. One turret on the lane the enemies actually use beats spreading thin coverage across several lanes — and it should be the balanced core role, because reliable damage and useful range hold up across repeated waves.
- Stop before the wallet is empty. Do not spend your entire coin balance before the first night. Repair-first discipline starts immediately: during a wave, a breach ends a run faster than lacking extra damage, so the coins still in your pocket are the ones that patch the wall.
From there, the order is diagnostic, not fixed. Upgrade whichever wall section or turret is directly limiting your survival:
- If enemies keep breaking through walls, reinforce those sections first.
- If waves survive long enough to damage the bunker, your turret coverage or placement is the problem — fix blocked firing angles and misplaced turrets before buying new ones. Adding turrets while existing ones are blocked wastes coins without improving defense.
Two habits tell you where the next coin belongs. Watch which lane receives the most damage in the first two waves and reinforce that side instead of spreading walls evenly. Before adding any new turret, watch one full night and note which wall section takes the most damage — that section, not wherever building feels most convenient.
One recorded run shows the principle in action: the player noticed the Verities always attacked from one side, left the opposite side of the base thin, and lined three shotgun turrets side by side right at the entrance behind hidden spike traps. That is a single-session read of one base, not a universal rule — but it is exactly the observation the diagnostic rule asks you to make on your own base.
When to choose a different improvement
The order shifts with the phase of your run. The phases are described as early, middle and late rather than exact wave numbers, so treat this as a sequence to follow, not a schedule to hit:
| Phase | Wall priority | Turret priority | Coin rule |
|---|---|---|---|
| Early waves | Close exposed entrances before upgrades | One turret on the main approach | Keep a reserve after the first builds |
| Middle waves | Upgrade frequently attacked sections | Add coverage only when a lane consistently slips through | Save for an emergency repair plus one upgrade |
| Late waves | Reinforce the weakest sections first, skip cosmetics | Upgrade proven positions, keep overlap | Enter hard waves with a reserve, not mid-wave income |
| Between waves | Inspect damage, find the next breach point | Check firing angles and coverage gaps | Split coins between repairs and the next upgrade |
The Verity mix shifts it further. Rushing Verities call for fast-attack defense near the entrance on a short lane; a durable Verity chewing through walls makes single-target damage on a long clear sightline the priority; grouped pushes are a job for crowd control at chokepoints; mixed late waves are what the balanced core role is for. One well-placed turret can handle the early waves, but as durability and group size grow, specialize once the core network holds: single-target damage for durable threats, crowd control for grouped pushes.
Escalation is the reason the order moves at all — the longer you survive, the harder the Verities become. Judge the bunker by the wave after next, not the one currently attacking. In practice, once enemy durability scales up in the late waves, stop repeatedly replacing transparent sections and shift new spending to the reinforced fallback line and turret upgrades.
The same stage logic flags the classic wastes: building multiple low-impact positions before the first defense works, adding turrets while existing ones are blocked, cosmetic upgrades while the core is vulnerable, and — in co-op — duplicate purchases from poor communication. Agree who buys what, stabilize the base, maintain damage, then add coverage.
Make the three opening purchases, then let one full wave of damage point at the next coin. For the wider context — what each wave asks of your base and how to last longer — the waves guide and how to survive more waves pick up from there.
Related Guides
How to Get Coins
The verified kill-and-earn loop: how defeating Verities during raid waves credits coins and which extras add more.
Bunker Upgrades
How bunker upgrades work: coins from Verity kills fund HP and durability gains at your base's buy menu.
Defense Upgrades
The documented upgrade route: repair first, spend between waves, and improve the firing positions already proving useful.
Progression Guide
The full coin-to-upgrade loop explained, including the wave-10 rebirth gate and how earning becomes survivability.