
How to Build a Bunker in Bunker vs Verity
A verified start-to-finish walkthrough for building your first functional bunker in Bunker vs Verity: dig in, place blocks, close the entrance, cover the roof.
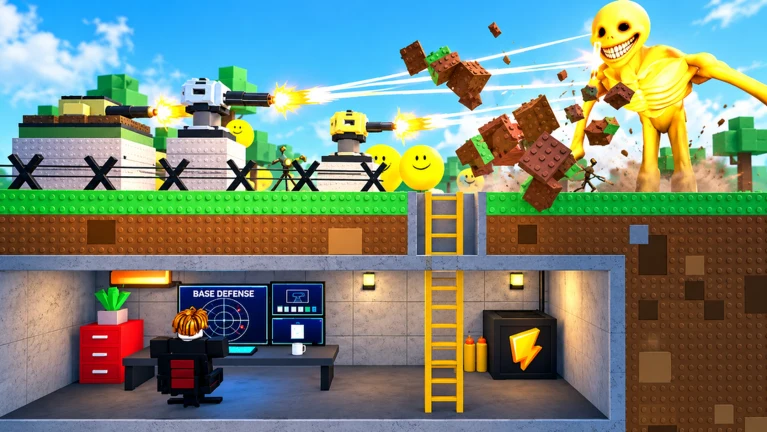
You can build a working first bunker in your first preparation window: dig into the shelter, open the blocks menu, and drag blocks into place until the entrance is closed and the roof is covered. Bunker vs Verity runs a day-and-night rhythm — daylight is for building, night is for surviving — and building locks once a Verity wave starts, so the shell has to be finished before the first wave arrives.
One note before the key presses: the controls named below (2 to dig, P for the blocks menu, 3 for the build menu) were all observed in PC gameplay videos, so treat them as PC bindings rather than universal controls, and expect details to shift after game updates.
Start by digging into the shelter
A new session starts with the game's own prompt: dig deeper, then build a wall, because a raid is coming. In the full playthroughs we checked, that begins with pressing 2 to dig. Digging is more than the tutorial's first chore — mining earns coins for blocks, and players have even dug up turrets this way.
Open the right menu and pick your first blocks
Two menus do different jobs: P opens the blocks menu used for walls, doors and filler pieces, while 3 opens the build menu used for placing turrets.
The blocks menu lists early blocks by HP — around 20 HP and 50 HP in the runs we checked — and one starter block is free, so your first wall costs nothing. Everything beyond that is bought with coins, and the trade-off is explicit in the menu: stronger materials cost more. One player compared an iron block against a stone one and picked stone to fit a starting budget; another built his first wall from a basic red block priced at 3 coins. Prices and HP climb steeply later — late-game players seal their bunkers with 50,000 HP Verity blocks — but the free starter block plus a few cheap pieces is enough for shell number one.
Watch two placement limits that show up early. You can only place what your inventory holds — one creator stalled after placing his three blocks — and larger placement caps are gated by progression: another player hit a build limit he attributed to not having rebirthed yet. Neither blocks a first build; buying in small batches is just normal. Farms and other income items are stricter: they are rejected at surface level and only place underground.
Place blocks: drag, stack, and frame a door
Placing is a drag, literally: select a block and drag it into position, then keep adding wall pieces in sequence until the shelter is walled off. Three habits from real runs make the shell stronger:
- Stack blocks as steps. Some high spots cannot be placed onto directly, so players pile blocks underneath and climb them to reach the roof line.
- Frame the entrance with a door block. Place a door first, then fill the blocks around it so it sits flush in the wall line. One player added two doors so Verities could not break in while he could still get in and out.
- Use ladders to reach your own roof. The utility and decor category includes ladders that climb up to a firing position on top of your structure.
Close the shell before the wave starts
Work around the whole perimeter, then cover the top. An open roof is a way in, and builders seal the roof line specifically so Verities cannot climb over it, leaving exterior sections open only where turret coverage is meant to reach. The success state is easy to recognize: the entrance is closed, and the shell is still standing when the raid ends.
The timer matters as much as the walls. Daylight is your building window, and you cannot build during an active Verity wave — one gameplay recording states it plainly, and purchases were locked during a raid in the same session. So treat nightfall as the deadline and finish every essential wall before the first Verities arrive.
Put your first turret on the main approach
Guides converge on the same order: walls and entrance first, turret second. Once the shell stands, press 3 for the build menu — there is a free turret to start with, and the next one observed cost 650 coins. Place it where it covers the approach Verities actually use: the main lane, not an isolated corner. And never build so tightly that a wall, prop or teammate blocks its line of fire — a blocked turret contributes zero damage regardless of its tier. For model choices and upgrades, see the turrets guide.
Fixing misplaced builds
Mistakes are recoverable. Gameplay recordings show placed equipment being deleted piece by piece, turrets taken down and re-placed somewhere better, unneeded wall sections knocked out, and whole rooms demolished for a stronger rebuild. Placed items can also be sold back for coins — one builder sold an item deliberately, and another did it by accident, which is a good reminder to check what you have selected before confirming.
One honest gap: none of the gameplay we verified names the exact button or menu option that triggers delete or sell, and refund amounts are not documented either. Treat selling as a way to clear a mistake or rework the layout, not as a guaranteed refund.
Pre-wave checklist
Before you start the next wave, run the same inspection experienced players use — it catches the three classic build errors: blocked turrets, exposed entrances, and missing wall sections.
- Entrances: the most exposed entrances are closed before any expensive upgrades.
- Firing angles: every turret has a clear lane, and your own walls are not in the way.
- Movement: there is a safe route through the interior and a fallback position behind the first layer.
- Coins: a reserve is kept for repairs — spending the full balance before nightfall removes the reserve that carries late waves.
- No decoration yet: decorative builds are the repeated beginner mistake; early resources belong to walls, the entrance, and coverage. Expand only when the current defensive line is fully functional.
From here the loop repeats: earn coins from waves and digging, repair the sections that took damage, and widen coverage as Verities grow tougher. Once the first shell survives comfortably, layout refinement is the natural next step — see the best bunker layout guide — and the building blocks page is the deeper reference for what to place next. If coins are the bottleneck, the how to get coins guide covers earning them faster.
Related Guides
Best Bunker Layouts
Compare four proven bunker layouts and copy the entrance-and-turret core every effective base shares.
Building Blocks
See which building blocks are confirmed in real runs, what each does, and how placement limits work.
Turret Placement
Place turrets where they actually defend: cover the main approach, overlap firing arcs, and keep every lane covered.
Beginner Guide
A first-session route from digging in to finishing night one with your bunker standing and coins to spare.