
Bunker vs Verity Turret Placement Guide: Where & How
Where to place turrets in Bunker vs Verity so they actually defend your bunker: cover the main approach, overlap firing arcs, and keep every lane covered.
The placement rule that holds up in every Bunker vs Verity guide and run: put your first turret where it watches the approach to your entrance down the largest shared firing lane, then place the next turret so its firing arc crosses the first. Overlapping coverage on one lane beats turrets scattered across several — and a turret whose firing path is blocked protects nothing, no matter how expensive it was.
Here is how to get turrets down, where players actually put them, and the placement mistakes that get bunkers breached.
Buying a turret and placing it
If you haven't built your bunker yet, start with how to build a bunker — placement only matters once you have walls and an entrance to defend. Turrets are funded by the coins Verities drop when you kill them (more on earning in how to get coins).
- Open the in-game shop and buy a turret. Every recorded run goes through the shop: one player's first turret was free with the next costing 650, a shotgun turret cost 800 in another run, and a third picked up a basic turret for about 300. Treat those as single-run observations, not a current price list. One run also pulled a turret as a digging reward.
- Place it at an open spot around your bunker. The spots players actually used: the middle of the defensive line facing the attack lane, turrets side-by-side right at the entrance, and turrets on top of the roof or a platform — reached by building block access first (see building blocks). No source documents how the game marks legal spots, so think of these as placements that worked in real runs rather than official placement rules.
- Let it fire — or take over. Placed turrets shoot automatically at anything coming down the lanes they face. The official game description also advertises direct control of placed turrets, which we cover in the turrets guide.
One caution from a recorded run: a player mass-placing turrets hit a hard limit — "I have to remove the turrets. I can't add any more." What triggers that cap isn't documented, so plan lanes rather than assuming unlimited slots.
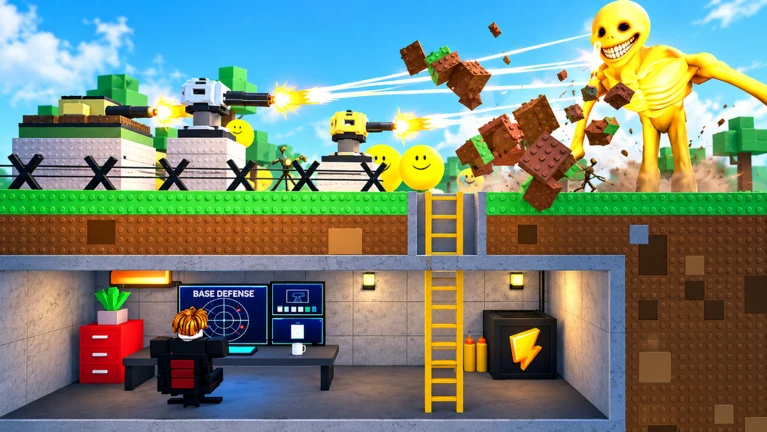
The placement sequence, in order
- Cover the main approach. Build the basic structure and close the entrances first, then place the first turret where it covers the entrance approach and the largest shared firing lane. One dependable position beats three scattered ones.
- Create overlap. Add the second defense so its firing arc crosses the first — overlapping coverage means no Verity walks through unharmed. Two arcs crossing at the entrance outperform two turrets watching separate secondary lanes.
- Fill proven gaps only. Add a turret when a lane is consistently slipping through or existing firepower can't clear a wave efficiently. If existing turrets are blocked or mispositioned, fix placement before buying more — new purchases on top of a broken network waste coins.
- Specialize for late waves. Once the core network holds, invest in single-target damage for durable threats and crowd control for grouped pushes.
Verification is part of placement. Before every wave, check three things: firing angles are unblocked, coverage has no gaps, and each turret is actually contributing damage. Repositioning a blocked turret is often worth more than buying a new one. Between waves, re-check angles, gaps, and whether existing turrets are pulling their weight.
Keep every firing arc unblocked
- Don't box in your own guns. Never build so tightly that walls, props or teammates block turret firing paths — a blocked turret contributes zero damage regardless of its tier. A final inspection before nightfall reveals blocked turrets you'd otherwise discover mid-wave.
- Use cover sparingly. Placing defenses behind strong structural sections protects them while preserving clear openings toward the approach — but overusing cover creates blind spots and shortens the effective range of your defense line.
- Read the terrain. Pick ground with clear sightlines toward likely approach lanes and room for repairs and expansion. Avoid terrain that blocks firing arcs or funnels enemies in behind your firing arc.
- Don't cluster the line. Failed defenses against giant Verities usually trace to two causes: walls never upgraded after the early waves, and turrets placed so close together that one large target blocks several firing fields at once. Before any new purchase, confirm every turret has a clear field of fire on the lane the threat actually uses.
Match placement to the threat
Turret value shifts with what the wave sends at you. The documented pairing of threat, placement and role:
| Threat pattern | Where to place | Turret role that fits |
|---|---|---|
| Rushing Verities | Near the entrance, short lane | Fast-attack early defense |
| Durable Verities | Along a long, clear sightline | Single-target damage |
| Grouped pushes | At chokepoints | Crowd-control defense |
| Mixed late waves | Covering the main approach | Balanced core defense |
Match your defense to the threat pattern rather than copying a layout blindly — the Verity enemies page breaks down what each type does.
Worked example: the glass-front bunker
Glass layouts amplify both the strengths and weaknesses of every position, because nothing hides the approach. Three template positions:
- Glass-Front Core — a balanced turret centered behind the transparent front, covering the main lane. Full-lane coverage from spawn; the best general-purpose setup, since extended sightlines let it fire across the entire enemy approach.
- Chokepoint Control — a crowd-control turret at the entrance. Strong in multi-threat waves; pair it with the fallback line, not the glass wall itself.
- Fallback Sniper — a single-target turret on the rear line. Covers breaches in the glass layer and scales well into late waves.
The success test is simple: if your turret can see and fire at enemies for the entire approach instead of only at the entrance, the layout is working. If you're comparing full structures rather than gun positions, see the best bunker layout.
The corrections real players had to make
- Front-only lines get flanked. One player concluded Verities only attacked from the front, moved his shotgun turrets side-by-side exactly at the entrance — then a wave came from the side ("they come from the side too... I didn't count on that") and forced an emergency reposition.
- Elevation protects, but facing matters. A run with turrets on top of the bunker held cleanly because nothing could reach up there — until a wave attacked from behind and every turret had to be rotated to the new direction.
- Verities dig. In another run they tunneled under the front line into the underground room, bypassing the gun line entirely. The player's own verdict: the defenses should have surrounded the base. If you hide underground, don't assume the floor above you is coverage.
These are single-run anecdotes, but they all land on the same adjustment: the main approach is where early pressure concentrates, so build the overlapping core there first — then leave no approach at zero.
Test it, then take control
Run one wave with your new layout and watch it live. Turrets firing the whole approach? Placement is working. Any turret standing idle while Verities are on the map? That's a blocked arc or the wrong lane — move it before you buy anything else. Once placements hold, learn to steer the guns yourself in direct turret control.
Related Guides
Turrets Guide
Every turret confirmed in gameplay — shotgun, gatling, Halo and variants — and which job each one does best.
Defense Strategy
Run the day-to-night defense cycle: overlapping turret coverage, repairs under fire, and coin spending by wave phase.
Best Bunker Layouts
Compare four proven bunker layouts and copy the entrance-and-turret core every effective base shares.
Defense Upgrades
The documented upgrade route: repair first, spend between waves, and improve the firing positions already proving useful.