
Bunker vs Verity Building Blocks
A verified guide to Bunker vs Verity building blocks: the block palette, the blocks confirmed in real gameplay and their demonstrated roles, plus placement limits.
Bunker vs Verity's official description promises to let you "fortify your bunker with tons of different blocks" — but it names none of them. What real gameplay does confirm: building runs through a block palette you open with P, placement is a drag-to-position action, at least one block is free, and everything else is bought with coins earned from Verity kills. This guide covers the blocks demonstrated in actual runs — a free starter block, HP-labeled palette entries, dirt, stone, iron, glass, cheap colored blocks and the 50,000 HP Verity block — plus the placement limits and wall-arrangement habits that make them work. Treat it as the set of blocks confirmed in play so far, not the game's complete official roster.
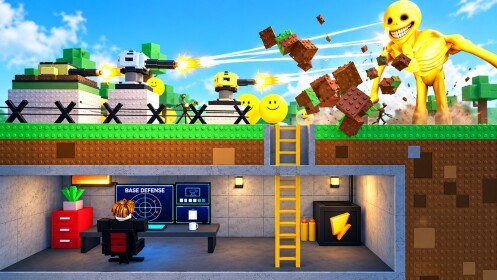
How to open and use the block palette
- Prepare the site. In one full walkthrough, the creator presses 2 to dig out the underground bunker first, then places wall blocks one by one around it before defending the core.
- Press P for blocks. The palette entries carry their own HP labels — one tutorial reads out 20 HP and 50 HP options — and at least one entry is free, so your first wall costs nothing.
- Drag blocks into place. You hold a block and drag it onto the base, building the wall up piece by piece; the raid-prep tutorial builds an entire wall this way before starting the raid.
- Fund better blocks with kills. Every Verity kill pays coins, and shopping mid-run for good blocks to ring your base is a normal part of a long survival attempt.
That HP label is the practical check the game hands you: the palette itself displays how strong each block is, and creators comparing entries describe the same trade — the stronger the block, the more it costs.
The blocks confirmed in gameplay
The names below are how players describe blocks in their own videos, not official menu labels — the menu shows icons and HP values. With that caveat, these are the blocks demonstrated in play:
| Block (as players name it) | Confirmed details | Seen used for |
|---|---|---|
| Free block | A palette entry that costs nothing | First walls at zero cost |
| 20 HP / 50 HP entries | HP labels read from the palette | Comparing wall strength before buying |
| Dirt block | Named the basic early material, kept distinct from stone | Cheap early walls and capping the roof over turrets |
| Stone block | Picked as a good option; stronger blocks cost more | Main wall line and a final, "safest" protection layer |
| Iron block | In the picker with an HP readout; stronger but pricier | A stronger tier once income allows |
| Glass block | Transparent; placed with the hammer tool | See-through covers over interior rooms and sealing rooftop gaps |
| Red / colored blocks | Several color variants; red costs about 3 coins each | Cheap filler for the first wall line in early waves |
| Verity block | Stated at 50,000 HP per block | Sealing the bunker perimeter, paired with two doors |
The one concrete stat worth dwelling on: on a heavily progressed account (rebirth 22, testing past wave 90), a creator seals his bunker with the block he calls the Verity block, citing 50,000 HP per block and adding two doors so Verities can't slip through — and the following raid's giant wave has a very hard time breaking the line. Its cost and availability were never stated, so don't count on finding it early, and read the 50,000 HP figure as a single-session observation rather than a guaranteed constant.
Placement limits, selling and climbing
You can run out of room to build. Two separate runs hit a hard stop: one creator filling his bunker finds nothing more can be placed and guesses it's because he hasn't rebirthed yet, while another finds only three of a block in his inventory and can't place more once they're used. Whether the cap is a per-block inventory, a total placement budget, or something that grows with rebirths isn't established. The practical read: assume your block supply is finite early on, spend it on the approach lane that actually gets attacked, and don't scatter filler everywhere.
Blocks are refundable. Blocks and held items can be sold back for coins — one creator deliberately sells surplus gear, and another sells a held block completely by accident while navigating menus. Check what you're holding before clicking sell.
Blocks double as stairs. When creators can't climb to a rooftop or elevated firing spot, they stack ordinary blocks to get up — useful for placing turrets high or plugging the last gap on top of your bunker.
How to arrange your walls
Community guides agree the arrangement matters as much as the block: bunker walls block the Verity approach and absorb damage, making them the structural backbone of any run. Place main walls and a controlled entrance first, keep the interior compact, and upgrade whichever sections take repeated hits before expanding. Limited space makes blocked firing angles and poor wall placement especially costly, and a coin reserve for emergency repairs is what keeps one breached wall from ending the run — more on this in the best bunker layout and defense strategy guides.
A fan build guide frames wall design as two philosophies: a transparent front layer maximizes turret sightlines and early threat detection but needs constant repairs during waves, while a reinforced fallback line absorbs repeated attacks, costs more upfront and carries late waves. Its recommended hybrid is a transparent front with a reinforced second line behind it. Two honest caveats: that guide is build philosophy rather than item documentation — it never names actual menu blocks — and gameplay footage mostly shows glass used for looks and gap-sealing, with no test confirming how much protection transparent sections give up. Use it as a design idea, check the turrets guide for the firing angles behind those sightlines, then read the HP labels in your own palette.
What to recheck after updates
Nearly every number here — the free entry, ~3-coin red blocks, the 20/50 HP labels, the Verity block's 50,000 HP — comes from a single session, and Roblox games get rebalanced. After a patch, press P and re-read the palette's labels before committing coins; the in-menu HP readout is always more current than any guide, this one included. The updates page tracks recent changes, and new players can pick up a coin head start from the latest codes before shopping.
Ready to build? Press P, drag the free block into your first wall line, and grow it around your main approach as coins come in. For the full loop from digging to defending, see the complete bunker build walkthrough, and fund the stronger tiers with the coin farming guide.
Related Guides
How to Build a Bunker
Dig in, open the block menu, and wall off a working first bunker before the first Verity wave arrives.
Best Bunker Layouts
Compare four proven bunker layouts and copy the entrance-and-turret core every effective base shares.
Turret Placement
Place turrets where they actually defend: cover the main approach, overlap firing arcs, and keep every lane covered.